Browning butter is a simple technique that can transform the flavor profile of classic chocolate chip cookies. By heating butter until the milk solids turn golden and nutty, the resulting cookies develop a deeper, more complex taste that complements the sweetness of chocolate and sugar. This approach does not require any special equipment or advanced skills, making it accessible for home bakers looking to elevate their baking routine.
The process of browning butter adds a subtle caramel-like note without introducing additional ingredients. It also slightly reduces the water content in the butter, which can affect the texture of the dough. Many bakers find that cookies made with browned butter have a more pronounced crispiness around the edges while maintaining a soft, chewy center. This method works well with standard chocolate chip cookie recipes and can be adapted to personal preferences regarding sweetness and texture.
Understanding how browning butter works and how it interacts with other ingredients helps bakers achieve consistent results. While each batch may vary due to factors such as humidity, oven temperature, and ingredient freshness, the basic principles remain the same. The following sections explore the reasoning behind key steps and offer observations on ingredient behavior during mixing and baking.
The Role of Browned Butter in Cookie Dough
When butter is heated beyond the melting point, its water content begins to evaporate and the milk solids start to toast. This process is known as browning and typically occurs between 250°F and 300°F (121°C–149°C). The resulting butter has a richer aroma and a flavor that is often described as nutty or toffee-like. In cookie dough, this flavor becomes the backbone of the final product, especially when combined with vanilla and chocolate.
Browned butter contains less water than regular butter because some of the water has evaporated during heating. This reduction in moisture can influence how the dough hydrates and spreads during baking. Dough made with browned butter may appear slightly drier or more crumbly than dough made with softened butter. However, once the sugars and eggs are incorporated, the structure typically stabilizes. The lower water content also means that the cookies may spread less than those made with un-browned butter, contributing to a thicker, chewier center in some cases.
It is important to allow the browned butter to cool before combining it with other ingredients. Adding hot butter to eggs or sugar can cause the eggs to scramble or the sugar to dissolve unevenly. Cooling the butter to room temperature or until it becomes opaque and creamy helps maintain a stable emulsion. Many recipes recommend refrigerating the browned butter until it solidifies partially, then creaming it with sugar as one would with regular softened butter.
Selecting and Preparing Ingredients
The choice of chocolate, sugar, and flour affects how the browned butter interacts with the dough. For chocolate chip cookies, semi-sweet or dark chocolate chips are common, but chopped chocolate bars can also be used. The size and shape of the chocolate pieces influence how they melt and distribute. Larger chunks create pockets of melted chocolate, while smaller chips distribute more evenly.
Sugar plays a dual role in texture and flavor. Granulated sugar encourages spreading and crispiness, while brown sugar adds moisture and a chewier texture due to its molasses content. A balance between the two types of sugar can help achieve the desired edge-to-center contrast. When using browned butter, the extra caramel notes from the butter complement the molasses in brown sugar, creating a layered sweetness.
Flour provides structure. All-purpose flour is commonly used because it has a moderate protein content that gives the cookies enough structure without making them tough. Overmixing the dough after adding flour can develop gluten, leading to denser cookies. Mixing just until the flour is incorporated helps maintain tenderness. Eggs bind the ingredients and contribute moisture. Using a whole egg plus an extra yolk can increase chewiness, as the yolk adds fat without additional water.
Step-by-Step Process Overview
Begin by placing butter in a light-colored saucepan or skillet. Light-colored cookware makes it easier to see the color change as the butter browns. Heat over medium heat, stirring frequently. The butter will melt, foam, and then subside. As the foam clears, small brown specks will appear at the bottom. Continue stirring until the specks turn golden and the butter smells nutty. Remove from heat immediately to prevent burning. Pour the browned butter into a heatproof bowl, including the browned solids. Allow it to cool to room temperature.
Once the butter has cooled, combine it with granulated sugar and brown sugar in a mixing bowl. Beat with a spatula or electric mixer until the mixture looks smooth and slightly lighter in color. Add an egg and vanilla extract, then beat until well combined. In a separate bowl, whisk together all-purpose flour, baking soda, and salt. Gradually add the dry ingredients to the wet mixture, stirring just until no streaks of flour remain. Fold in chocolate chips or chunks.
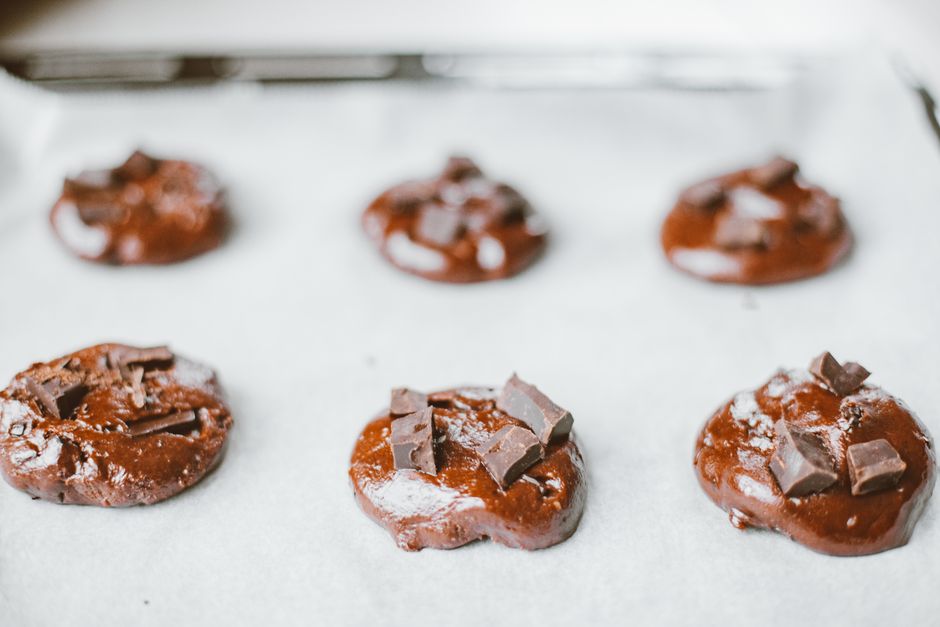
Chilling the dough for at least 30 minutes is often recommended, though not strictly required. Chilling allows the flavors to meld and solidifies the fat, which can reduce spreading. Scoop portions of dough onto a parchment-lined baking sheet, leaving space between each ball. Bake in a preheated oven at 350°F (175°C) until the edges are golden and the centers appear slightly underdone. Let the cookies cool on the baking sheet for a few minutes before transferring to a wire rack.
Factors That Influence Texture and Appearance
The degree to which the butter is browned can alter the final result. Lighter browning produces a milder flavor and may not affect texture noticeably. Darker browning intensifies the nutty taste but also risks a bitter note if scorched. The amount of time the dough is chilled also matters. Longer chilling times often lead to thicker cookies with less spread, while shorter times yield flatter, crispier edges.
Oven temperature variation is another factor. An oven that runs hotter may cause the edges to set quickly, resulting in a more domed center. A cooler oven may allow more spread. Using a baking sheet that is too dark can absorb more heat and lead to over-browning on the bottom. Rotating the baking sheet halfway through baking helps promote even coloring.
The size of the dough portions influences the ratio of crispy edge to chewy center. Larger portions take longer to bake through, so the center remains softer. Smaller portions bake faster and can become uniformly crisp. For consistent results, using a cookie scoop or measuring spoon helps maintain uniform size. Observing the cookies as they bake offers clues: the edges should be golden brown, while the center may still look soft and slightly puffy. Removing them from the oven at this stage allows carryover heat to finish setting the structure.
Storing and Serving Observations
Once cooled, browned butter chocolate chip cookies can be stored in an airtight container at room temperature for several days. The texture may soften slightly over time, especially if the weather is humid. Placing a slice of bread in the container can help maintain softness, though the bread may absorb some of the cookies’ moisture. For longer storage, the dough itself can be frozen in pre-portioned balls. Baked cookies also freeze well and can be reheated briefly in a low oven.
These cookies pair well with cold milk, coffee, or tea. The nutty notes from the browned butter complement the bitterness of dark chocolate and the sweetness of the dough. Because the flavor is complex, simple accompaniments such as vanilla ice cream or a dusting of flaky salt may enhance the experience without overwhelming the palate.
Baking is influenced by many variables, and each kitchen environment introduces its own conditions. Adjusting the amount of flour, the type of chocolate, or the browning time can lead to variations in the final cookie. Keeping notes on what works in a particular setting can help refine the process over time.